
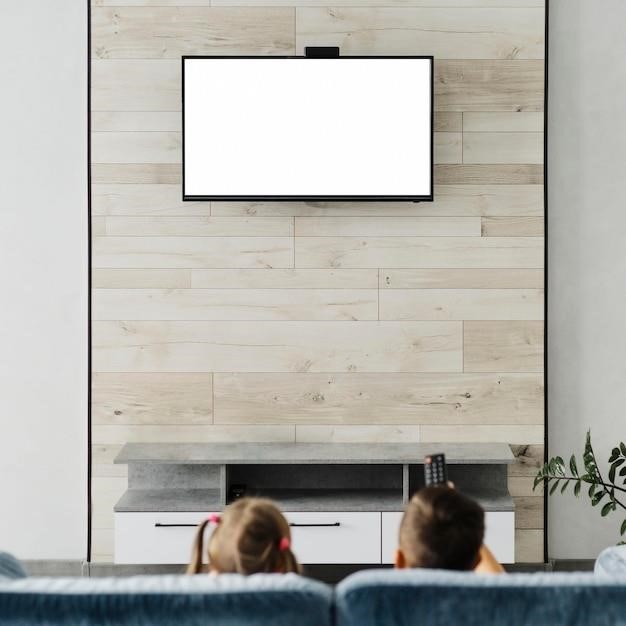
TV Wall Mount Installation⁚ A Comprehensive Guide
This guide provides step-by-step instructions for installing a TV wall mount; Safety is paramount; always consult your specific mount’s instructions. Ensure your wall can support the combined weight. Proper tools are essential for a secure and successful installation, preventing damage and injury.
Choosing the Right Wall Mount
Selecting the appropriate TV wall mount is crucial for a safe and aesthetically pleasing installation. Consider your TV’s size and weight; the mount’s weight capacity must significantly exceed your TV’s weight. Check the VESA compatibility – the standardized mounting hole pattern on the back of your TV – to ensure a perfect fit. Different mounts offer varying features⁚ fixed mounts provide a flush, secure installation; tilting mounts allow for slight angle adjustments; and full-motion mounts offer extensive swivel and tilt capabilities, ideal for optimal viewing from various positions.
Assess your viewing preferences and room layout. A fixed mount is suitable if your viewing angle is consistent. A tilting mount is useful if you need to adjust the angle to reduce glare or accommodate different seating arrangements. Full-motion mounts are best for rooms where viewing angles change frequently or when you need maximum flexibility. Finally, consider the aesthetics; some mounts are designed to be discreet, while others are more visible. Choose a mount that complements your TV and home decor, ensuring both functionality and visual appeal.
Assessing Your Wall Type and Structure
Before commencing the installation, carefully assess your wall type and structure to ensure it can safely support your TV and mount. Different wall materials require different mounting hardware and techniques. Drywall, commonly found in residential settings, needs specialized anchors for secure mounting. Wood-stud walls offer superior support, allowing for direct screwing into the studs. Concrete or brick walls require robust anchors designed for such dense materials. Always check the wall’s structural integrity; avoid mounting on weakened or damaged sections. Consider the wall’s load-bearing capacity; the combined weight of your TV and mount should be significantly less than the wall’s maximum load.
If unsure about your wall’s type or load-bearing capabilities, consult a qualified professional. Improper assessment can lead to the mount failing, resulting in damage to your TV or even injury. Using a stud finder is crucial for wood-stud walls to accurately locate the studs. For drywall or concrete walls, use appropriate anchors rated for the combined weight. Remember to check local building codes and regulations regarding wall mounting. A thorough assessment is key to ensuring a safe and successful TV wall mount installation. Never compromise on safety.
Pre-Installation Preparations⁚ Tools and Materials
Before you begin, gather all necessary tools and materials. This ensures a smooth and efficient installation process. Essential tools include a stud finder (for wood-stud walls), a level, a drill with appropriate drill bits (matching the size of your wall anchors and screws), a screwdriver (Phillips and/or flathead, depending on your hardware), a measuring tape, a pencil, and possibly a hammer (for driving in anchors). Safety glasses and work gloves are also recommended to protect against potential injuries; Check your wall mount’s instruction manual for a complete list of required tools and hardware. This list may include specialized tools.
In terms of materials, you will need the wall mount itself, all the included screws, anchors, and any additional hardware specified in the instructions. You may need additional wall anchors depending on your wall type. If using drywall, ensure you have appropriate drywall anchors rated for the combined weight of your TV and mount. For concrete walls, use concrete anchors specifically designed for heavy-duty applications. Have extra screws and anchors on hand in case of mistakes or breakage. Remember that having the correct tools and materials ready will significantly improve the efficiency and safety of your installation.
Mounting the Wall Plate⁚ Wood Stud vs. Concrete
Mounting the wall plate differs significantly depending on whether your wall is constructed of wood studs or concrete. For wood stud walls, use a stud finder to locate the studs. Mark their locations on the wall. The wall plate should be mounted directly onto the studs for optimal support. Use the appropriate screws provided with your wall mount kit to securely fasten the plate to the studs. Ensure the wall plate is perfectly level using a level tool throughout the process. This is crucial for a straight and stable TV mounting. Double-check the levelness before completely tightening the screws.
Concrete walls require a different approach. You’ll need appropriate concrete anchors, which are typically included with the wall mount kit. Drill pilot holes at the marked locations using a drill bit slightly smaller than the diameter of your anchors. Insert the anchors into the holes and tap them gently with a hammer until they are flush with the wall’s surface. Then, mount the wall plate onto the anchors using the provided screws. Again, ensure the plate is perfectly level before fully tightening the screws. Using the correct anchors and drilling the right size pilot holes is critical for a secure and safe installation on concrete walls. Failure to do so can result in the TV falling.
Connecting the TV to the Wall Mount Bracket
Before attaching your television, carefully examine the back of your TV to identify the VESA mounting hole pattern. This pattern consists of four holes used to secure the TV to the mount. Consult your TV’s manual for precise measurements and screw specifications. The wall mount bracket should have corresponding holes designed to align perfectly with your TV’s VESA pattern. Select the appropriate screws for your TV from those provided in your mounting kit; using incorrect screws can damage your TV. Incorrect screws can also jeopardize the stability of the wall mount.
Once you’ve confirmed the correct screws and alignment, carefully lift your television and align the mounting holes on the back of the TV with the holes on the wall mount bracket. Insert the screws, ensuring they are going in straight and easily. Don’t force them; if they don’t go in smoothly, double-check alignment. Tighten the screws gradually and evenly, ensuring a firm and secure connection between the TV and the wall mount bracket. Avoid over-tightening, as this could damage your TV or the mount. Once the screws are snug, double-check the stability of the TV before proceeding to the next step.
Securing the TV to the Wall Plate
With the TV connected to the mount bracket, carefully lift the entire assembly and align the bracket with the wall plate. The wall plate should be securely mounted to the wall studs or concrete anchors (depending on your wall type and the installation method you chose). Ensure that the bracket and wall plate align perfectly before proceeding. This step often requires a second person to help support the weight of the TV safely and securely.
Once aligned, you’ll typically find locking mechanisms on the wall plate designed to secure the bracket. These could be levers, clips, or screws; refer to your specific wall mount instructions to identify and engage these locking mechanisms. Gently but firmly engage the locking mechanisms, ensuring a snug and secure fit. Once secured, test the stability of the TV by gently tugging on it. If it feels loose or wobbly, re-check the locking mechanisms and ensure they are properly engaged. If the TV remains unstable, review the instructions or seek assistance.
Cable Management and Concealment
After securing your TV, address cable management to maintain a clean and organized look. Excess cables can be unsightly and potentially dangerous if they create a tripping hazard. Many wall mounts offer built-in cable management features, such as channels or clips to neatly route cables. Utilize these features to organize your cables, running them along the wall mount and down to the floor or power outlet.
If your mount doesn’t have built-in cable management, consider using cable ties or Velcro straps to bundle and secure cables. Tuck and secure the cables behind the TV and wall mount as much as possible. Neatly organize the cables behind the TV, ensuring they don’t obstruct movement or interfere with the TV’s operation. You can also use raceways or other cable concealment systems to hide cables completely, providing a seamless and professional finish. Remember to leave some slack in the cables to allow for future adjustments or repairs without needing to re-mount the TV.
Post-Installation Checks and Adjustments
Once the TV is mounted, perform a thorough inspection to ensure stability and functionality. Carefully check all screws and connections to verify they are securely tightened. Gently tug on the TV to assess its stability; any wobbling indicates a problem requiring immediate attention. If the TV is tilting or not level, carefully loosen the appropriate screws, make the necessary adjustments, and retighten. Ensure the screws are adequately tightened but avoid over-tightening, which can damage the mount or TV.
Test the functionality of all ports and connections, ensuring that all cables are properly connected and functioning correctly. Check the TV’s picture quality and audio output to confirm everything works as expected. If any issues are present, such as a loose connection or faulty cable, address them promptly. Take a step back to admire your newly mounted TV and enjoy the improved viewing experience. A final check ensures long-term enjoyment and prevents potential future problems; Remember, safety is key; if anything feels loose or insecure, rectify it immediately.
Troubleshooting Common Issues
If your TV isn’t level after installation, carefully loosen the mounting screws, adjust the position, and retighten. Ensure the wall plate is firmly secured to the wall studs or using appropriate anchors for concrete. A wobbly TV suggests loose screws or inadequate wall support; re-check all connections and consider using stronger anchors. If the TV is too high or low, remounting may be necessary; plan your ideal viewing height before beginning installation.
Cable management issues? Use cable ties or clips to neatly organize and conceal cables, preventing tangling or damage. Poor picture or sound quality might indicate a loose cable connection; double-check all cables at both the TV and wall mount ends. If problems persist after trying these fixes, consult the TV and wall mount manuals for further troubleshooting guidance or contact customer support for assistance. Remember, safety is critical; if you encounter difficulties beyond your capabilities, seek professional help to avoid damage or injury.
Safety Precautions and Warnings
Before starting, always read the entire installation manual thoroughly. Never attempt installation if you are unsure about any step; seek professional help. Ensure the wall structure can support at least four times the combined weight of the TV and wall mount. Use appropriate safety equipment, including safety glasses and gloves, to protect yourself from injury during the installation process. Never work alone; have an assistant to help lift and support the TV, especially for larger, heavier models.
Always turn off the TV and unplug it from the power outlet before beginning installation to prevent electric shock. Be cautious when handling the TV; avoid dropping it or applying excessive force, which could damage the screen or internal components. Use the correct tools and hardware; incorrect tools or hardware can lead to an unsafe installation. If you encounter any unexpected issues or difficulties during installation, immediately stop and consult the manual or seek professional assistance. Remember, safety is the top priority. Improper installation can lead to serious injury or property damage.