
Sure-Jell Strawberry Freezer Jam Instructions PDF: A Comprehensive Guide
Making strawberry freezer jam with Sure-Jell is a fantastic way to capture summer’s fresh flavors. Follow these instructions carefully for a successful batch. This guide provides a comprehensive overview, ensuring delicious homemade jam every time. You’ll enjoy this simple recipe.
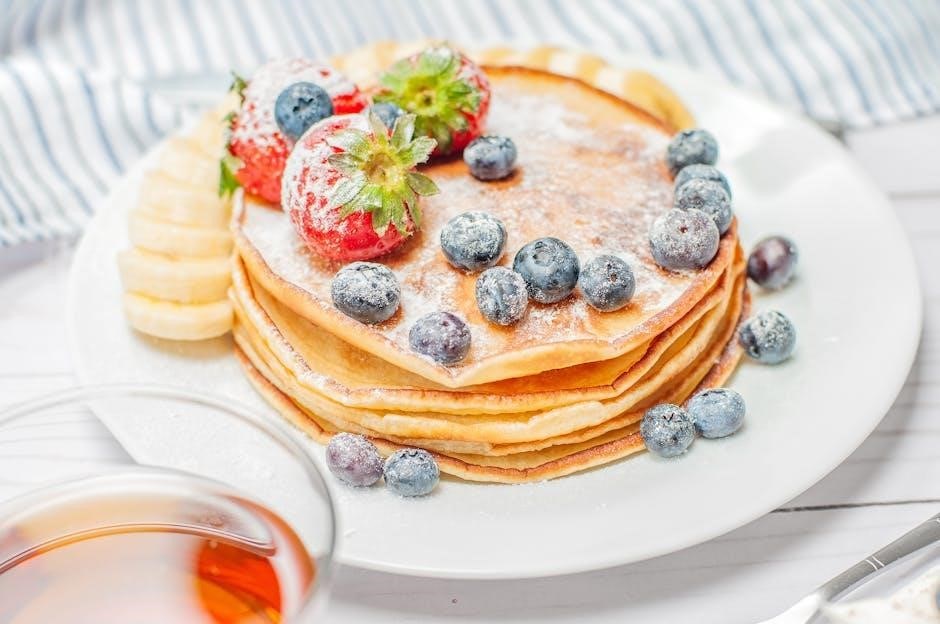
Strawberry freezer jam is a delightful homemade treat that offers a burst of fresh strawberry flavor, capturing the essence of summer in a jar. Unlike traditional cooked jams, freezer jam retains a brighter, more vibrant taste because the fruit isn’t subjected to prolonged high heat. This method preserves the strawberries’ natural sweetness and texture, resulting in a jam that tastes remarkably close to freshly picked berries.
One of the greatest advantages of making strawberry freezer jam is its simplicity. The process is straightforward and requires minimal cooking, making it an excellent option for both novice and experienced jam makers. With just a few basic ingredients – ripe strawberries, sugar, and pectin – you can create a delicious spread that’s perfect for toast, biscuits, scones, or even as a topping for ice cream.
Freezer jam is also incredibly versatile. You can easily adjust the sweetness level to suit your preferences, and it’s a great way to use up an abundance of fresh strawberries from your garden or local farmers market. Plus, because it’s stored in the freezer, you can enjoy the taste of summer all year round; Whether you’re looking for a quick and easy breakfast topping or a homemade gift, strawberry freezer jam is a wonderful choice.
Understanding Sure-Jell Pectin
Sure-Jell pectin plays a crucial role in achieving the perfect set for your strawberry freezer jam. It’s a commercially prepared form of pectin, a natural substance found in fruits that helps them to gel or thicken. Understanding how Sure-Jell works is essential for ensuring your jam reaches the desired consistency.
There are different types of Sure-Jell pectin available, including original and low-sugar varieties. The original Sure-Jell pectin is designed for recipes with a standard amount of sugar, while the low-sugar pectin allows you to reduce the sugar content without compromising the jam’s ability to set. It’s important to use the correct type of pectin for your chosen recipe to avoid issues with setting.
When using Sure-Jell, it’s vital to follow the instructions provided in the box or recipe carefully. The amount of pectin needed depends on the quantity of fruit and sugar used. Typically, Sure-Jell is mixed with a portion of the sugar and then added to the crushed strawberries. For some recipes, the pectin is boiled with water before being combined with the fruit.
Proper mixing and dissolving of the pectin are also critical. Ensure that the pectin is fully dissolved in the sugar or water to prevent lumps and ensure even distribution throughout the jam mixture. This will help the jam set uniformly and achieve the ideal texture.
Essential Ingredients for Strawberry Freezer Jam
Creating delicious strawberry freezer jam requires just a few key ingredients, each playing a vital role in the final product. First and foremost, you’ll need fresh, ripe strawberries. The quality of your berries directly impacts the flavor of your jam; select berries that are fragrant and fully red for the best results.
Granulated sugar is another essential ingredient, contributing to the jam’s sweetness and aiding in the setting process. The amount of sugar specified in the recipe is crucial for achieving the correct consistency, so be sure to measure accurately. Avoid reducing the sugar content unless you are using a low-sugar pectin specifically designed for that purpose.
Sure-Jell pectin is what helps the jam thicken properly; Be sure to use the kind of pectin that corresponds to the sugar content that you want to use. You can find the exact instructions in the Sure-Jell box.
Water is often included in freezer jam recipes to help dissolve the pectin and create the right consistency. The amount of water is important, so follow the recipe’s measurements closely. Some recipes may also call for a small amount of butter to reduce foaming during the cooking process, though this is optional.
Having these essential ingredients on hand and ensuring they are of good quality will set you up for success in making a delightful batch of strawberry freezer jam.

Step-by-Step Instructions: Preparing the Strawberries
The first step in making delicious strawberry freezer jam is properly preparing your strawberries. Begin by thoroughly rinsing the strawberries under cool water to remove any dirt or debris. Gently pat them dry with a clean towel.
Next, remove the green stems from each strawberry. This can be done easily with a paring knife or by using a strawberry huller. Ensure that all stems are removed, as they can affect the texture and flavor of the jam.
Once the stems are removed, it’s time to crush the strawberries. You can use a potato masher, a food processor, or even your hands to crush the berries. If using a food processor, be careful not to over-process them into a puree. You want to have some chunks of strawberries remaining for a better texture.
Measure the crushed strawberries using a liquid measuring cup to ensure you have the correct amount specified in your recipe. Typically, most recipes call for about 2 cups of crushed strawberries.
Finally, if your recipe instructs you to let the crushed strawberries stand with sugar, follow those directions carefully. This step helps to draw out the natural juices from the strawberries and dissolve the sugar, creating a flavorful base for your freezer jam.
Step-by-Step Instructions: Mixing Ingredients with Sure-Jell
Once your strawberries are properly prepared, the next crucial step is mixing them with Sure-Jell pectin. In a large bowl, combine the crushed strawberries and the sugar as specified in your Sure-Jell recipe. Ensure that you measure the sugar accurately, as the correct ratio is essential for the jam to set properly. Stir the mixture well until the sugar begins to dissolve into the strawberries. Some recipes recommend letting this mixture stand for about 10 minutes, stirring occasionally, to further dissolve the sugar.
In a separate small saucepan, combine the Sure-Jell pectin with water, following the exact measurements provided in your recipe. Bring this mixture to a boil over high heat, stirring constantly to prevent the pectin from clumping or sticking to the bottom of the pan. Once the mixture reaches a full rolling boil that cannot be stirred down, continue to boil for exactly one minute, still stirring constantly.
Remove the pectin mixture from the heat and immediately pour it into the bowl with the strawberry and sugar mixture. Stir continuously for about three minutes, or until the sugar is completely dissolved and the mixture is no longer grainy. This step is critical to ensure the pectin is evenly distributed throughout the jam.

Your strawberry freezer jam mixture is now ready to be poured into sterilized containers for setting.
Boiling Process: Achieving the Right Consistency
The boiling process is a critical step in making Sure-Jell strawberry freezer jam, as it ensures the pectin activates properly and the jam achieves the desired consistency. This method typically involves bringing a mixture of water, pectin, and sometimes sugar to a rolling boil before combining it with the crushed strawberries. The key is to maintain constant stirring during the boiling phase to prevent scorching and ensure even heat distribution.
When using Sure-Jell, follow the specific instructions provided in the package, as different types of pectin may require slightly different boiling times and techniques. Typically, you’ll combine the pectin with a specific amount of water in a saucepan and bring it to a full rolling boil over high heat. A “full rolling boil” means the mixture continues to boil vigorously even while you are stirring it.
Once the mixture reaches this stage, continue boiling for precisely one minute, stirring constantly. This short boiling time is essential for activating the pectin’s gelling properties. After boiling, immediately remove the mixture from the heat and combine it with your prepared strawberry mixture. Stir continuously for about three minutes to ensure the ingredients are thoroughly combined. This step helps the jam set properly once it cools.
Remember, achieving the right consistency depends on accurate measurements and careful adherence to the boiling instructions.
Container Preparation: Sterilization and Filling
Proper container preparation is crucial for ensuring the longevity and safety of your homemade Sure-Jell strawberry freezer jam. Sterilizing the containers helps eliminate any bacteria or microorganisms that could spoil the jam during storage. While a full canning process isn’t required for freezer jam, taking steps to clean and prepare your containers is essential.
Begin by washing your plastic containers and lids with hot, soapy water. Rinse them thoroughly to remove any soap residue. For an extra measure of sterilization, you can rinse the containers and lids with boiling water right before filling them. Ensure the containers are completely dry before adding the jam, as excess moisture can affect the jam’s consistency and preservation.
When filling the containers, leave about ½ inch of headspace at the top to allow for expansion during freezing. Overfilling can cause the containers to crack or burst in the freezer. Use a clean spoon or ladle to transfer the jam into the prepared containers. After filling, wipe the top edges of the containers clean with a damp cloth to ensure a good seal.
Immediately cover the containers with their lids, pressing down firmly to secure them. Label each container with the date and contents for easy identification. Proper container preparation and filling techniques are key to enjoying your strawberry freezer jam for months to come.
Setting Time: Room Temperature Considerations
After filling and sealing your containers of strawberry freezer jam, allow them to sit at room temperature for a specific period to facilitate the setting process. This crucial step allows the pectin in the Sure-Jell to activate and create the desired jam consistency. The recommended setting time is typically 24 hours.
During this time, avoid disturbing the containers or moving them around excessively, as this can interfere with the setting process. Place the filled containers on a flat surface, away from direct sunlight or heat sources. The ideal room temperature should be relatively stable, ideally between 68°F and 72°F (20°C to 22°C).
Higher temperatures may cause the jam to set improperly, while lower temperatures may prolong the setting time. After the 24-hour period, check the consistency of the jam. It should have thickened noticeably and have a spreadable texture. If the jam appears too runny, you can allow it to sit for a few more hours, but be aware that it may not fully set if the initial steps were not followed correctly.
Once the jam has reached the desired consistency, it is ready for refrigeration or freezing. Remember that freezer jam typically has a softer set than traditional cooked jam, but it should still be firm enough to spread easily. Proper room temperature considerations during the setting time are vital for achieving the best results with your homemade strawberry freezer jam.
Storage Instructions: Refrigeration and Freezing
Once your strawberry freezer jam has properly set at room temperature, it’s time to consider storage. Proper storage is crucial for maintaining the jam’s quality and preventing spoilage. For immediate use, refrigerate the jam in the sealed containers. Refrigerated freezer jam will typically last for up to 3 weeks.
Ensure the containers are tightly sealed to prevent contamination and maintain freshness. If you wish to store the jam for a longer period, freezing is an excellent option. Freezer jam can be stored in the freezer for up to 1 year without significant loss of quality.
When freezing, use freezer-safe containers that leave about ½ inch of headspace to allow for expansion as the jam freezes. Label each container with the date to keep track of how long it has been stored. To thaw frozen jam, transfer it to the refrigerator and allow it to thaw slowly.
Thawing in the refrigerator helps maintain the jam’s texture and prevents it from becoming too watery. Once thawed, use the jam within a few weeks for the best flavor. Avoid refreezing thawed jam, as this can affect its quality and texture. By following these storage instructions, you can enjoy your homemade strawberry freezer jam for months to come.
Troubleshooting: Addressing Common Issues (Runny Jam)
One of the most common issues encountered when making strawberry freezer jam is a runny or unset jam. Several factors can contribute to this problem, and understanding them is key to troubleshooting. The most frequent cause is an imbalance in the ratio of fruit, sugar, and pectin. Ensure you’re using the exact measurements specified in the Sure-Jell instructions.
Using too little pectin or too much fruit can prevent the jam from setting properly. Another potential issue is the quality of the pectin itself. Make sure your Sure-Jell pectin is fresh and hasn’t expired, as older pectin may lose its gelling ability. Insufficient stirring during the mixing process can also lead to a runny jam. Stir the mixture consistently and thoroughly to ensure the pectin is evenly distributed.
Sometimes, the sugar might not be fully dissolved, which can interfere with the setting process. Continue stirring until the sugar is completely dissolved and no longer grainy. Additionally, ensure that you’re letting the jam set at room temperature for the full 24 hours, as this is crucial for the pectin to activate properly. If your jam remains runny after 24 hours, you can try re-cooking it with additional pectin, following the instructions provided in the Sure-Jell box for rescue methods.
Tips for Success: Ensuring a Perfect Set
Achieving a perfect set with your Sure-Jell strawberry freezer jam requires attention to detail and adherence to best practices. Start by selecting the freshest, ripest strawberries available. These berries contain natural pectins that contribute to the gelling process. Ensure your strawberries are at room temperature before crushing them, as this helps them release their natural juices and pectin more effectively.
Accurate measurements are crucial. Use proper measuring cups and spoons to ensure the correct ratio of strawberries, sugar, and Sure-Jell pectin. Do not reduce the amount of sugar, as it’s essential for the setting process and acts as a preservative. When mixing the ingredients, stir continuously until the sugar is completely dissolved. Grainy sugar can hinder the pectin’s ability to create a firm set.
Use a clean, sterilized mixing bowl and utensils to prevent contamination. During the setting period, maintain a consistent room temperature, ideally around 70-75°F (21-24°C). Avoid placing the jars in a drafty area or near a heat source. After filling the containers, leave the recommended headspace to allow for expansion during freezing. Finally, be patient and allow the jam to set for the full 24 hours before refrigerating or freezing. Following these tips will greatly increase your chances of achieving a perfect set every time.
Alternative Recipes: No-Cook Freezer Jam Methods
Variations: Low-Sugar Pectin Options
For those seeking to reduce their sugar intake while still enjoying homemade strawberry freezer jam, low-sugar pectin options offer a delightful solution. Sure-Jell provides a “For Less or No Sugar Needed Recipes” pectin, specifically designed for recipes with reduced sugar content. This pectin allows you to create delicious jam without compromising on taste or texture. When using low-sugar pectin, it’s essential to follow the specific instructions provided on the package, as the ratios of fruit, pectin, and any added sweeteners may differ from traditional recipes.
Instead of refined sugar, consider using natural sweeteners like honey, maple syrup, or stevia. However, be mindful that these alternatives can affect the jam’s flavor and consistency. Honey and maple syrup, for instance, impart their unique flavors to the jam, while stevia requires careful measurement to avoid a bitter aftertaste.
Experiment with different combinations to find your preferred level of sweetness. You might also explore adding lemon juice or other acidic fruits to enhance the jam’s flavor and aid in the setting process. Remember that low-sugar jams may have a slightly softer set than their traditional counterparts, but they will still provide a delightful taste of summer with a healthier twist.