
NOCO Genius10⁚ A Comprehensive Overview
The NOCO Genius10 is a versatile 10-amp device functioning as a battery charger, maintainer, and desulfator for both 6-volt and 12-volt batteries․ Its advanced technology simplifies the charging process for various lead-acid battery types, including lithium (LiFePO4), wet, gel, MF, and CA batteries․ The user manual provides comprehensive safety instructions and operational guidance․
Safety Precautions and Warnings
Before using the NOCO Genius10, carefully read and understand all safety instructions․ Failure to comply may lead to severe injury, death, or property damage․ Always wear appropriate safety glasses and gloves to protect against potential hazards like acid splashes or electrical shocks․ Ensure adequate ventilation to prevent the buildup of flammable gases during the charging process․ Never attempt to charge a damaged or frozen battery, as this could cause an explosion or fire․
Keep the charger away from moisture and rain․ Do not expose the unit to extreme temperatures․ Always disconnect the charger from the power source before making any connections or adjustments․ Inspect the battery terminals and cables for any signs of damage before connecting the charger․ Avoid touching the battery terminals while the charger is connected․ If you smell smoke or notice any unusual sounds or overheating, immediately disconnect the charger and contact customer support․
The NOCO Genius10 manual emphasizes the importance of correctly identifying the battery type and voltage before initiating the charging process․ Using the wrong settings or connecting to an incorrect battery can result in damage to the charger, the battery, or both․ Remember that lead-acid batteries contain corrosive sulfuric acid; handle them with caution and avoid skin contact․ If acid comes into contact with skin or eyes, immediately flush the affected area with plenty of water and seek medical attention․
Technical Specifications and Features
The NOCO Genius10 boasts a 10-amp charging capacity, suitable for various 6-volt and 12-volt lead-acid battery types․ Its multi-stage charging process ensures optimal battery health and longevity․ The charger automatically detects the battery’s voltage and adjusts the charging parameters accordingly․ This intelligent design prevents overcharging and maximizes battery lifespan․ The Genius10 incorporates a desulfation mode, which helps restore the capacity of sulfated batteries․ This feature is crucial for reviving batteries that have lost performance due to neglect or age․
The unit features multiple LED indicators that provide real-time feedback on the charging status․ These visual cues help users monitor the progress and troubleshoot potential issues․ The Genius10 is equipped with spark-proof technology, enhancing safety during connections․ The robust construction and durable components guarantee reliable performance in diverse environments․ The included clamps and ring terminals offer flexibility for connecting to various battery types and configurations․ The compact design makes it convenient for storage and portability․
The NOCO Genius10’s compatibility extends to diverse lead-acid battery chemistries, including flooded, gel, AGM, and maintenance-free batteries․ The automatic voltage detection ensures that the charger adapts to the specific battery without requiring manual intervention․ Its robust circuitry protects both the charger and the battery from damage during the charging cycle․ The charger’s low-maintenance design is a significant advantage for users seeking a reliable and hassle-free charging solution․
Charging Different Battery Types
The NOCO Genius10 is designed for charging a wide range of 6V and 12V lead-acid batteries․ Its compatibility extends to various battery chemistries, including flooded, gel, AGM (Absorbent Glass Mat), and maintenance-free batteries․ The charger automatically detects the battery type and adjusts the charging parameters accordingly, ensuring optimal charging for each specific battery chemistry․ This automated process simplifies the charging procedure, eliminating the need for manual adjustments․
For flooded batteries, the Genius10 delivers a controlled charging current to prevent overcharging and ensure optimal electrolyte levels․ Gel and AGM batteries require a gentler charging approach, and the Genius10 automatically adapts its charging profile to meet these specific requirements; Maintenance-free batteries benefit from the Genius10’s intelligent charging algorithm, which prevents overcharging and maintains the battery’s health over extended periods․ The charger’s ability to handle different chemistries makes it a versatile tool for various applications․
Lithium (LiFePO4) batteries are also supported by the Genius10, although specific charging parameters may vary depending on the battery’s capacity and specifications․ Always refer to the manufacturer’s recommendations for the specific lithium battery being charged to ensure safe and effective charging․ The Genius10’s versatility and automatic detection features simplify the charging process for different battery types, reducing the risk of errors and ensuring optimal battery performance․ Consult the NOCO Genius10 manual for detailed instructions on charging different battery types and capacities․
Using the NOCO Genius10
The NOCO Genius10’s user-friendly design simplifies the charging process․ Securely connect the clamps to the battery terminals, observing polarity (+ and -)․ Monitor the LED indicators to track the charging progress and battery status․ Consult the manual for troubleshooting any issues․
Connecting the Charger to the Battery
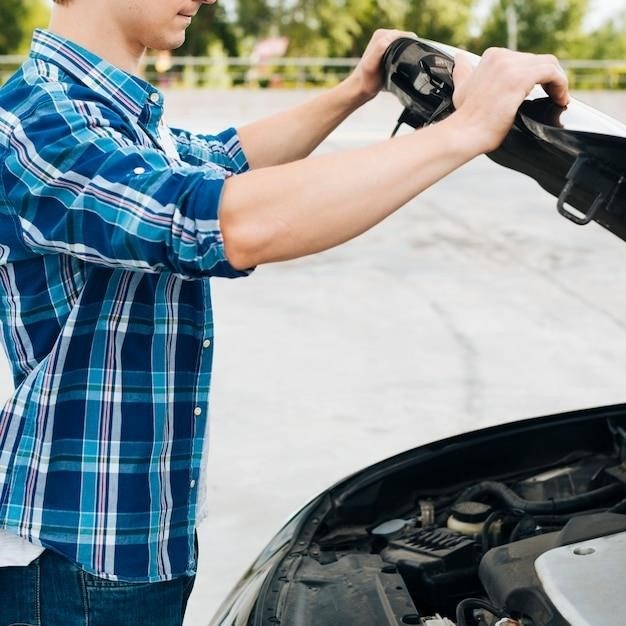
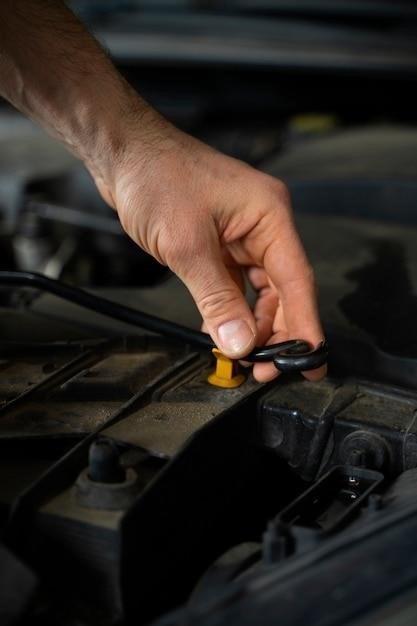
Before connecting the NOCO Genius10 charger to your battery, carefully review all safety precautions outlined in the user manual․ Ensure the charger is turned off․ Identify the positive (+) and negative (-) terminals on your battery․ These are usually clearly marked․ The NOCO Genius10 typically comes with clamps or eyelet terminals․ If using clamps, firmly attach the red (+) clamp to the positive (+) battery terminal and the black (-) clamp to the negative (-) terminal․ Make sure the clamps are securely fastened to prevent accidental disconnection during the charging process․ If using eyelet terminals, securely connect them to the battery terminals, ensuring a tight and reliable connection․ Avoid loose connections, which can lead to sparking or overheating․ Always double-check your connections before turning on the charger․ Improper connections can cause damage to the charger, the battery, or even personal injury․ After making the connections, carefully inspect them again to ensure they remain secure․ Refer to the detailed diagrams in the manual for visual guidance if necessary․ Remember, proper connection is crucial for safe and efficient battery charging․
Charging Process and Indicators
Once the NOCO Genius10 is correctly connected to the battery, turn the charger on․ The unit will automatically detect the battery voltage and initiate the appropriate charging cycle․ Observe the LED indicators on the charger; they provide real-time feedback on the charging status․ Different colors and patterns typically correspond to different charging stages, such as initial assessment, bulk charging, absorption charging, and float maintenance․ The user manual provides a detailed explanation of each indicator and its significance․ During the charging process, it’s normal for the battery to get slightly warm․ However, excessive heat generation indicates a problem․ If the battery becomes excessively hot, immediately disconnect the charger and consult the troubleshooting section of the manual․ The charging time depends on various factors, including the battery’s capacity, state of charge, and ambient temperature․ The manual provides estimated charging times for various battery sizes․ Do not interrupt the charging process unless absolutely necessary․ Allow the charger to complete the cycle to ensure optimal battery charging and health․ The NOCO Genius10 is designed to automatically switch to a maintenance mode once the battery is fully charged, preventing overcharging․ Always monitor the charging process and refer to the manual for any unusual occurrences․
Troubleshooting Common Issues
The NOCO Genius10 manual includes a dedicated troubleshooting section to guide users through common problems․ If the charger fails to turn on, check the power connection and ensure the outlet is functioning correctly․ If the LED indicators show an error code, refer to the manual’s error code table for explanations and recommended solutions․ A blinking red light often signifies a problem with the battery or connections․ Inspect the battery terminals for corrosion; clean them if necessary․ Ensure the clamps are securely attached to the battery posts, making good contact․ Loose connections are a frequent cause of charging issues․ If the charger displays a low-voltage indication, the battery may be severely discharged or damaged․ In such cases, consider using a jump starter to provide a boost before attempting charging with the Genius10․ If the battery remains consistently hot during the charging process, this indicates a potential problem with the battery itself or an issue with the charging circuit․ Disconnect the charger immediately and consult the manual or seek professional help․ Always prioritize safety when troubleshooting; refer to the safety precautions outlined in the manual before attempting any repairs or interventions․ The manual offers detailed guidance for various scenarios, helping to resolve most common issues and ensure safe operation․

Maintenance and Care
Regularly inspect the NOCO Genius10 charger for any signs of damage․ Clean the unit with a damp cloth, avoiding harsh chemicals․ Store in a cool, dry place when not in use․ Refer to the warranty information for details on coverage and repair options․
Cleaning and Storage
Maintaining the cleanliness of your NOCO Genius10 charger is crucial for its longevity and optimal performance․ Before cleaning, always ensure the charger is unplugged and completely disconnected from any power source and battery․ This precaution is paramount to prevent electrical shock and potential damage to the device․ For cleaning, use only a slightly damp, soft cloth to wipe the exterior casing․ Avoid using abrasive cleaners, solvents, or excessive moisture, as these can damage the unit’s surface and internal components․ Never immerse the charger in water or any other liquid․ After cleaning, allow the charger to dry completely before storing or using it again․
Proper storage is equally important for preserving the charger’s functionality․ Store the NOCO Genius10 in a cool, dry place, away from direct sunlight, extreme temperatures, and moisture․ Avoid storing it in areas with high humidity, as this can lead to corrosion and other problems․ Keep the charger away from dust and debris to prevent potential malfunctions․ If you’re storing the charger for an extended period, it’s recommended to disconnect it from any accessories and store it in its original packaging, if possible․ This will provide additional protection against damage and ensure its readiness for use when needed․ Following these simple cleaning and storage guidelines will help maintain the optimal condition and functionality of your NOCO Genius10 battery charger for years to come․
Warranty Information
The NOCO Genius10 battery charger typically comes with a warranty, the specifics of which should be detailed within the included documentation․ This warranty usually covers defects in materials and workmanship under normal use conditions․ However, it’s crucial to carefully review the warranty terms and conditions provided by NOCO to understand the full extent of coverage․ The warranty period might vary depending on your region and the specific retailer from where you purchased the charger․ It is advisable to retain your proof of purchase, such as the receipt or order confirmation, as this will be required to make a warranty claim․ The warranty may not cover damages resulting from misuse, neglect, accidents, unauthorized repairs, or modifications to the charger․ Typical exclusions often include damage caused by water, improper handling, or use outside the specified operating parameters detailed in the user manual․
To initiate a warranty claim, you will likely need to contact NOCO’s customer support directly․ Their contact information, including phone number, email address, and possibly an online support portal, should be readily available on their official website or within the warranty documentation․ Providing them with your proof of purchase, a description of the issue, and any relevant photos or videos can facilitate the claim process․ NOCO’s customer service team will guide you through the necessary steps to determine the eligibility of your claim and arrange for repair or replacement, depending on the specific terms of the warranty․