

2×4 Workbench Plans⁚ A Comprehensive Guide
Discover diverse 2×4 workbench plans‚ from beginner-friendly designs to more advanced projects. Explore detailed instructions‚ materials lists‚ and helpful tips for building your own sturdy and functional workbench. Free PDF downloads and online guides are readily available to assist your DIY endeavor.
Building your own workbench is a rewarding experience that blends practicality with personal satisfaction. A custom-built workbench‚ tailored to your specific needs and workspace‚ offers unparalleled versatility. Unlike mass-produced models‚ a DIY workbench allows you to optimize dimensions‚ material choices‚ and features for your unique projects. The readily available 2x4s provide an economical and surprisingly robust foundation for your creation. Whether you’re a seasoned woodworker or a novice DIY enthusiast‚ constructing a workbench from 2x4s is a manageable and fulfilling project. This guide will empower you with the knowledge and resources to embark on this exciting journey‚ transforming your workspace and enhancing your crafting experience. From simple designs to more intricate builds‚ the possibilities are endless‚ limited only by your imagination and available space. Embrace the DIY spirit and create the perfect workbench for your needs.
Choosing the Right 2×4 Workbench Plan⁚ Factors to Consider
Selecting the ideal 2×4 workbench plan requires careful consideration of several key factors. First‚ assess your available space and determine the appropriate dimensions for your workbench. Consider the types of projects you’ll undertake‚ as this influences the required workbench height and surface area. Examine the complexity of the plans; beginner-friendly options utilize straightforward designs and readily available tools‚ while more advanced plans may incorporate intricate joinery techniques. Evaluate the materials list to ensure you can readily source lumber and hardware. Consider the overall sturdiness and stability of the design. A well-constructed workbench should support the weight of your tools and materials without wobbling. Finally‚ review user reviews and feedback on chosen plans to gain insights into the construction process and overall satisfaction. By carefully weighing these factors‚ you can choose a 2×4 workbench plan that perfectly suits your skill level‚ space constraints‚ and project needs. Happy building!
Essential Tools and Materials for Your Project
Before embarking on your 2×4 workbench construction‚ gather the necessary tools and materials. Essential tools include a measuring tape for accurate cuts‚ a circular saw or hand saw for cutting lumber‚ a drill with various drill bits for pilot holes and screw insertion‚ a level to ensure stability‚ clamps to secure components during assembly‚ and a screwdriver or impact driver for fastening. Safety glasses and work gloves are crucial for personal protection. Regarding materials‚ you’ll primarily need 2×4 lumber‚ the quantity depending on your chosen plan; Wood screws of appropriate length are essential for secure joining. Wood glue can enhance joint strength and stability. Consider adding a top surface material like plywood or a solid wood plank for increased durability and a smoother work surface. Optional additions include wood stain or paint for aesthetic enhancement‚ and wood sealant for protection against moisture damage. Ensure you have enough screws and glue to complete the project. Check your chosen plan for a comprehensive list of materials and quantities.
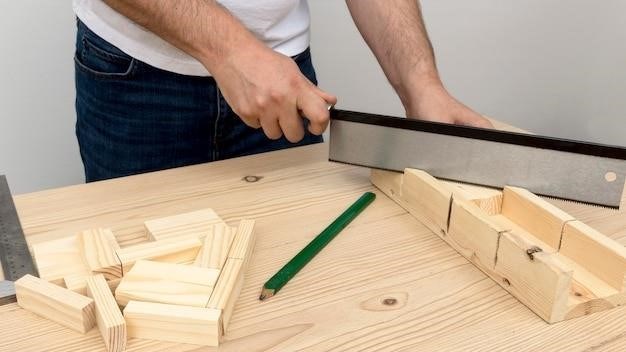
Step-by-Step Construction⁚ Building the Workbench Frame
Constructing the workbench frame is the foundational step. Begin by carefully reviewing your chosen plan’s dimensions and cutting list. Accurately measure and cut your 2×4 lumber to the specified lengths. Precise cuts are critical for a stable and square frame. Use a saw‚ ensuring smooth‚ clean cuts to avoid splintering. Next‚ assemble the frame. Most plans utilize a rectangular design‚ joining the 2x4s at right angles using wood screws. Pre-drilling pilot holes is recommended to prevent wood splitting and ensure a secure connection. Apply wood glue to the joints before screwing to add extra strength and stability. Use clamps to hold the pieces together while the glue dries and the screws are tightened. Check for squareness at each corner using a speed square or measuring diagonally. Ensure all corners are perfectly 90 degrees for a strong and level frame. Once the glue is fully dry‚ remove the clamps and inspect the frame for any imperfections before proceeding to the next assembly stage. Remember‚ a well-built frame is the key to a sturdy and long-lasting workbench.
Assembling the Legs and Support Structures
With the workbench frame complete‚ focus on attaching the legs and any intermediate support structures. Refer to your specific plan’s diagrams for precise measurements and placement. Typically‚ legs are constructed from 2x4s‚ cut to your desired workbench height. Ensure the legs are perfectly vertical and evenly spaced‚ maintaining the frame’s squareness. Secure the legs to the frame using screws and wood glue‚ pre-drilling pilot holes to prevent splitting. For added stability‚ consider incorporating support structures like cross-braces or a bottom shelf. These elements significantly enhance the workbench’s rigidity and load-bearing capacity. If your plan includes a bottom shelf‚ position it according to the instructions‚ ensuring it is level and securely fastened to the legs and frame. Use the same techniques – pre-drilling‚ wood glue‚ and screws – for attaching the support structures. Check for squareness and stability throughout the process‚ making any necessary adjustments to guarantee a sturdy and functional workbench. Remember‚ proper leg and support structure assembly is crucial for a long-lasting‚ robust work surface.
Adding the Top⁚ Techniques for a Sturdy Surface
Creating a robust and level workbench top is paramount. Many 2×4 plans utilize multiple 2x4s arranged side-by-side and glued together for increased strength and stability. This method ensures a wider and more durable surface compared to using a single‚ wider board‚ which might be prone to warping. Before assembly‚ carefully measure and cut your 2x4s to the exact dimensions specified in your plan‚ ensuring all pieces are perfectly aligned and flush. Apply wood glue liberally to the joining surfaces‚ clamping the 2x4s tightly together to prevent gaps and ensure even bonding. Allow the glue to cure completely‚ as per the manufacturer’s instructions—typically 24 hours—before proceeding. For added stability‚ consider using screws or dowels to reinforce the joints‚ especially if the workbench is intended for heavy-duty use. Once the glue has fully dried‚ the top can be attached to the workbench frame. Use screws and wood glue to secure it‚ ensuring even weight distribution and a strong‚ stable connection. A properly constructed top will be the foundation of your workbench’s longevity and performance.
Finishing Touches⁚ Sanding‚ Staining‚ and Sealing
After assembly‚ sanding is crucial for a smooth‚ professional finish. Begin with coarser grit sandpaper (around 80-100 grit) to remove any imperfections or splinters‚ gradually progressing to finer grits (120-220 grit) for a progressively smoother surface. Always sand in the direction of the wood grain to avoid scratches. Once sanded‚ you can enhance the workbench’s appearance and protect the wood with a stain or paint. Apply the stain or paint evenly using a brush or roller‚ following the manufacturer’s instructions. Allow sufficient drying time before applying a sealant. A sealant protects against moisture‚ scratches‚ and general wear and tear. There are various types of sealants available‚ including polyurethane‚ varnish‚ and lacquer‚ each offering different levels of durability and sheen. Choose a sealant suitable for your intended use and desired finish. Apply several thin coats‚ allowing each coat to dry completely before applying the next. This multi-layered approach ensures thorough protection and a durable‚ long-lasting finish. Remember proper ventilation when using stains and sealants. A well-sealed workbench will be more resistant to damage and easier to clean‚ extending its lifespan and usability.
Alternative Workbench Designs Using 2x4s
While standard 2×4 workbench plans offer a solid foundation‚ exploring alternative designs can unlock unique functionalities and aesthetics. Consider incorporating a mobile base using casters for easy relocation. This is ideal for smaller workspaces or those needing frequent repositioning. Adding a built-in vise significantly enhances the workbench’s utility‚ particularly for woodworking tasks requiring secure clamping. Varying the height of the workbench can accommodate different tasks and user preferences. A taller workbench is better suited for standing work‚ while a lower one might be preferable for seated tasks. Think about integrating additional storage solutions‚ such as shelves or drawers‚ directly into the workbench structure. This helps keep your workspace organized and tools readily accessible. Experiment with different top materials. While a solid 2×4 top is durable‚ consider alternatives like plywood or even a thick piece of melamine for a smoother‚ more resilient surface. A folding workbench design can save space when not in use. These modifications allow you to customize your workbench to perfectly fit your specific needs and preferences‚ maximizing its practicality and adapting it to your unique workflow.
Free 2×4 Workbench Plan Resources⁚ PDFs and Online Guides
Numerous online resources offer free 2×4 workbench plans in PDF format and as online guides. These plans vary in complexity‚ catering to both novice and experienced DIY enthusiasts. Websites dedicated to woodworking often feature downloadable plans with detailed instructions‚ diagrams‚ and cutting lists. Many plans include helpful tips and tricks to ensure a successful build. Some websites provide video tutorials alongside their written instructions‚ offering a visual guide to the construction process. Blogs and forums dedicated to DIY projects frequently share user-submitted plans and experiences. These user-generated resources offer diverse perspectives and alternative approaches to building a 2×4 workbench. Remember to carefully review the plan’s specifications before starting your project. Ensure you have the necessary tools and materials before downloading and commencing construction. Always double-check measurements and follow instructions precisely to ensure a safe and sturdy workbench. The availability of free resources simplifies the process of finding a plan that perfectly matches your skill level and project goals.

Time-Saving Tips and Tricks for Efficient Construction
Pre-drilling pilot holes before screwing is crucial for preventing wood splitting‚ especially when working with 2x4s. Using a clamp to secure pieces during assembly ensures accurate alignment and prevents shifting. Employing a miter saw for precise cuts significantly reduces construction time compared to using a hand saw. Organize your materials beforehand; having everything readily accessible streamlines the process. Consider using a power drill with a driver bit for faster screw insertion. If staining or sealing is planned‚ do this before assembly for easier access to all surfaces. A well-organized workspace reduces the time spent searching for tools and materials. Utilize pre-cut 2x4s from a lumberyard if time is a significant constraint. Employing a helper for lifting and maneuvering larger components speeds up the assembly significantly. Invest in quality tools; robust tools work more efficiently‚ reducing frustration and wasted time. Planning your project meticulously‚ including reviewing the instructions thoroughly before starting‚ minimizes errors and rework. Using a speed square ensures accurate 90-degree angles for the frame construction. Prioritize accuracy during the initial stages of the build‚ as errors can compound later. Accurate measuring and marking are foundational for a smooth and efficient build.
Troubleshooting Common Issues During Assembly
Uneven legs are a common problem; use shims under shorter legs to level the workbench. If screws are stripping‚ switch to a slightly larger screw size or use a different type of screw. For warped 2x4s‚ consider using clamps to straighten them before assembly‚ or incorporate the warp into the design if possible. If joints are loose‚ add wood glue to strengthen the connection and let it dry completely. Misaligned components can be corrected by carefully loosening screws‚ realigning‚ and retightening. If the workbench is unstable‚ check that all joints are securely fastened and that the legs are properly supported. For cracks or splits in the wood‚ use wood filler to repair the damage and sand smooth before finishing. If the tabletop is not perfectly flat‚ use a plane or sander to level the surface. If the workbench is too wobbly‚ consider adding bracing or cross supports to increase stability. Remember to always double-check measurements before cutting and assembling components. Use a level throughout the construction process to ensure everything is square and level. If any pieces are damaged‚ it’s best to replace them rather than trying to repair them. Improperly tightened screws can lead to instability; ensure all screws are fully tightened. If you encounter unexpected difficulties‚ consult online forums or woodworking communities for assistance.
Maintaining Your 2×4 Workbench⁚ Tips for Longevity
Regularly inspect your workbench for loose screws or damaged parts. Tighten any loose screws periodically to prevent instability and ensure the workbench remains structurally sound. Apply a fresh coat of sealant or varnish every few years to protect the wood from moisture damage and wear. This will help preserve the wood and extend its lifespan. Clean the workbench after each use to remove debris and prevent buildup of dust and grime. A simple wipe-down with a damp cloth is usually sufficient. Avoid placing excessively heavy items on the workbench‚ especially in concentrated areas‚ which could cause damage to the structure. Distribute weight evenly across the surface to prevent warping or stress points. If you notice any cracks or splits in the wood‚ repair them promptly using wood filler to prevent further damage. Sand down any rough edges or splinters to prevent injury and maintain a smooth surface. Store the workbench in a dry place to prevent moisture damage‚ which can lead to warping‚ rot‚ or mold. Avoid direct sunlight or excessive humidity. Consider adding protective coverings or mats to the surface to prevent scratches or damage from tools or materials. Periodically inspect the legs and supports for any signs of wear or instability. If necessary‚ reinforce weak points or replace damaged components. With proper care and maintenance‚ your 2×4 workbench can provide years of reliable service.